
When I start taking culinary photos I discovered that is not so easy to take great photos. Just because your food is not moving that doesn’t mean is easy to take photos of it. Takes time and practice to start taking decent culinary photos.
When I did this amazing Risotto with mushrooms and cheese recipe I fell in love with the texture and color of the rice and I thought to do more photos with different styling.

As you will see in the photos, you can use different props for the same food. This is the best exercise you can do to start learning about styling and props. Play around with everything you have in the house.
Leave the same settings and just change the background or the props. I had natural light coming from the right side and I had a wooden background. I took a lot of photos from different angles and with different props.
To get to be a good food stylist you need to be first a good cook. I am still working to be a good cook. Learning to style your food takes time, practice and lots of food. Paying attention to details is also an important asset for a food stylist.

Here is the recipe. I started from the basic recipe for risotto and build it on the way. Everything was done in the kitchen in the moment, nothing was planned. When you have just a few ingredients in the fridge, improvisation is a way to go. I loved what I got in the end. I used chili flakes because I love a little bit of spicy food. It is up to you if you want to use it or not.
Ingredients:
- 300 g mushrooms champignon
- 1 cup brown rice
- 1 onion
- 1 teaspoon mustard
- ½ teaspoon chili flakes
- 1 hand parsley
- 1 teaspoon dry thyme
- 2 garlic gloves
- 1 teaspoon turmeric
- Salt
- Pepper
- Parmesan
- 1 glass white wine
- 1 tablespoon butter
- 1 liter vegetable broth
- Olive oil
Directions:
Warm 2 tablespoons olive oil in a large saucepan over medium-high heat. Stir in the mushrooms, and cook until soft, about 3 minutes. Remove mushrooms and their liquid, and set aside.
In the skillet we are making the risotto put 1 tablespoon oil. Add the onion, turmeric, chili flakes, thyme, garlic and the mustard and stir for 1 minute. Add the rice.
When the rice has taken on a pale, golden color, pour in wine, stirring constantly until the wine is fully absorbed. Add 1/2 cup broth to the rice, and stir until the broth is absorbed. Continue adding broth 1/2 cup at a time, stirring continuously, until the liquid is absorbed and the rice is al dente, about 15 to 20 minutes.
Remove from heat, and stir in mushrooms with their liquid, butter and Parmesan. Season with salt and pepper to taste. Garnish with fresh parsley.
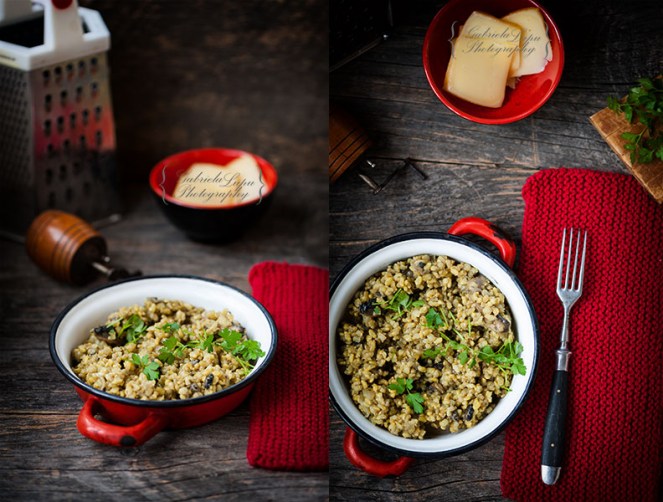
The more time you spend to make your food attractive, the easier it gets to take the shot. Make more food than a plate so you have material to play with. Before starting to take photos get all the props on the table. Make a selection of pots, plates, cutlery, backgrounds or cloths you want to use in the photo. Maybe you will not use them all, but is good to have them near you. You can also stage some photos without the food.
Your food is the hero in the story. Every props you use need to participate in the story you want to tell. If you want vintage, everything must be vintage. If you want modern, everything goes modern.
In my story, my hero is mushrooms with cheese risotto. I used a brown rustic bowl on a wooden background because I wanted my story to be rustic.
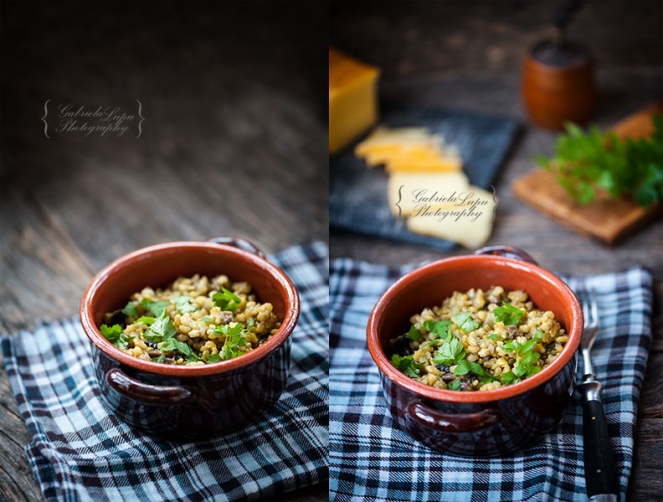
First shot was only with the bowl and the cloth. I put some fresh parsley on top, to complement my dish. I have fresh parsley in the garden. If you by the herbs some hours before, keep them in a jar with water.
From there I build the second shot adding some ingredients from the recipe in the background: cheese and parsley. I used an old pepper grinder in the back and I put the parsley on a piece of wood. The focus is always on the bowl.
For me, setting up a table for food photography takes time. So, when the light is good, I am in an inspirational mood and I have time, I am taking more photos with the same settings. In the photos you will see I have a corner with lots of light coming from lots of windows.
Here I used only a diffusible panel to have smooth shadows. The background is the same, my beautiful old wooden board. I also added a grey shawl and a yellow board. The light was the same, only the styling and the props changed in the photos.

As you can see is so easy to play around with just one dish and some bowl, cutlery, tablecloths, etc. You can create magical culinary photos with just a little, so start making your favorite dish and take lots of photos. It will help to have a plan before.
These days technology evolve very much so for a food blog you don’t need a very expensive equipment. With a Compact Camera from Light you are on the right path to create great photos for your blog.

Very awesome picture, i know certain dish is not easy to photograph as well. You did one good job there!
Thank you
What lovely photos! I am working on this as well. I wish I could capture what I feel for the food I make in my photos. I think I have some constraints with photo shoot location and props though. I am cooking in a new kitchen now, so the lighting is so much better, however, I’ve lost natural light. 😦 This recipe sounds so good, though. I’ve made Risotto once and loved it. I am definitely going to try this recipe.
Thank you
This has given me some great ideas for taking photos of my food – excellent post. Now I am seriously craving a mushroom risotto yummmm! 🙂
Thank you
I haven’t had a good risotto in a while…and your photography makes me want to make some today. Thanks for posting about how to take better food photography…the food doesn’t move but the clouds do changing the lighting. Things I never noticed before. Practice makes progress. Have a great day.
Thank you. You are welcome. Have a great day!
This is the ultimate pictures goal for me. Thanks for the recipe
You are welcome
Good morning and thanks for the nice article. I do like the pictures with the external set-up but you’re missing the most important view of a risotto: its interior. The real litmus test of a risotto, which is basically a hearty soup that has to slowly evaporate during the cooking process, is the degree of the creaminess it has when it’s about to be savored. My cousin Adriana in San Dona di Piave, the Veneto, taught me a terrific trick several years ago in their bar kitchen: after finishing the cooking, you must put the lid on and let it stand for at least half an hour. You should have put a portion on a plate and use different lighting techniques to exalt it so we can see the distinctive brilliance I am by no means an expert in photography but I consider myself a skilled amateur at preparing terrific risottos.
Arrivederci!
Thank you for your information. I will do it next time.
Volontieri!
Nice Blog….amazing photographs..thanks for sharing it..
I would like to share some image sharing work
hope you would like it.
Nature Wallpaper
and
Wallpaper hd
Desktop backgrounds
Thank you
beautiful..very informative..
Thank you
Wow your photos are amazing! We are just starting out in food photography ourselves and it’s been a learning curve to say the least! My photographer friend says that lighting makes all the difference and to invest in some good lights… But you mentioned you used natural lighting for these? In your experience… What do u recommend?
You can find here about lighting, settings and others things about food photography
https://cooking-without-limits.com/category/food-photography-tips/
Thanks for the link! I’ve read it and it sounds like what we need might be a camera tripod, not a photography light,.. Appreciate your insight!
Happy to help
amazing photos
Thank you
Great photos! I know it is not easy to take them!
Thank you
Great tip! You are right, if you go to the trouble of preparing a beautiful dish its good to take lots of different photos of it using different crockery and dressing elements. Thank you!
You are welcome
Love it and the knitted red item looks great!
Thank you
I love taking different pictures of the dishes myself; good suggestion! This is a post where I took various pictures of my yogurt brioches https://amarange.wordpress.com/2018/03/31/sensualeaster/
Beautiful pictures and the risotto looks delicious! I love the various shots you took to tell your story 🙂
Thank you
Thank you for this great lesson
You are welcome